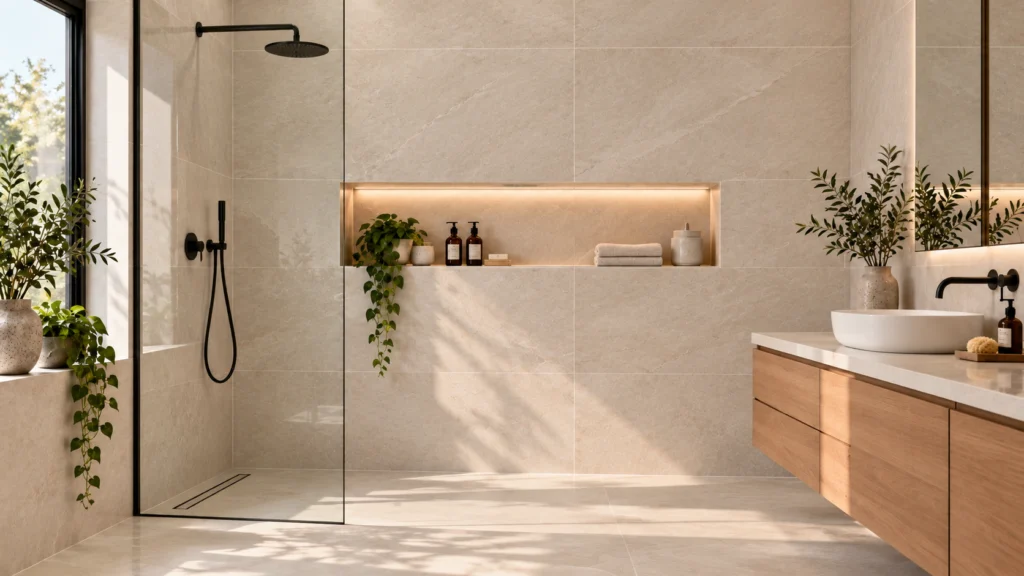
Wall tile design covers far more than picking a colour, from full-height versus feature-band layouts to format, texture and grout choices. Lighting and fitting placement, such as sockets and shower valves, also shape how a finished wall looks and functions. Planning these details early generally helps avoid awkward cuts later. As always, check the specifications before you specify a wall tile layout for your project.
Why Wall Tiling Decisions Differ From Floor Decisions
Wall tiling involves different planning considerations from floor tiling, since tile weight, substrate condition, adhesive selection and format all need to be considered for vertical installation the technical difference between floor-rated and wall-rated tiles is covered separately in our floor tiles vs wall tiles guide. This article focuses on the design and planning side of wall tiling instead.
- Weight matters more. Larger or heavier tiles need adhesive and substrate support suited to vertical loading, and this should be confirmed with the installer.
- Substrate condition. Uneven or unprepared walls can affect how flat large-format tiles sit, particularly with bigger panels.
- Format limits. Not every floor-format tile is offered or recommended in the same size for walls; availability should be checked with the supplier.
- Design freedom. Wall applications can accommodate decorative textures, reliefs and finishes that may not be practical for floors.
- Not interchangeable in both directions. Floor-rated tiles are often also suitable for wall use, but wall-rated tiles are generally not suitable for flooring, since floor and wall products are typically engineered to different strength and wear requirements, as outlined above.
Full-Height, Half-Height and Feature Band Layouts
Deciding how far tiling extends up a wall is one of the first design choices in any project, and this generally shapes both the visual impact and the budget. Full-height tiling, half-height (dado-style) tiling and a contained feature band each create a different mood and involve different planning.
| Layout | Visual Effect | Grout Line Exposure | Commonly considered for |
| Full-height | Seamless, elevated feel | More joints across full wall | Bathrooms, statement kitchen walls |
| Half-height (dado) | Defined lower zone, easier budget | Fewer tiles, clear cut-off line | Powder rooms, budget-conscious projects |
| Feature band / accent | Bold, contained focal point | Minimal, contained area | Backsplash accents, TV feature walls |
- Full-height. Often chosen for bathrooms and statement kitchen walls to create a continuous, more immersive appearance
- Half-height. A dado line paired with paint or panelling above is commonly used to manage cost while keeping a tiled lower zone.
- Feature band. A contained strip of mosaic tiles or an accent panel is often used behind a stove, vanity or TV console as a focal point.
- Transition detailing. Edge trims or a change in tile orientation commonly mark the transition between tiled and untiled zones.
Planning the Backsplash Zone for Cleanability
Backsplash zones behind stoves, sinks and prep areas are generally planned around ease of cleaning as much as appearance, since these areas face regular splashes, grease and steam, similar to considerations covered in our kitchen tiles guide. Zone height and material choice both affect how easily the surface can be maintained.
- Zone height. Backsplashes are often extended higher behind a stove than behind a sink, depending on cooking style and layout.
- Surface finish. Glazed or smoother finishes are commonly easier to wipe down than heavily textured surfaces in grease-prone zones, when properly specified, installed and maintained.
- Grout joints. Fewer joints can reduce the number of visible grout lines, while joint width should follow the tile and installation system specifications.
- Extending beyond the counter. Some designs extend the backsplash tile to the ceiling or around a full wet-kitchen wall for a more cohesive look.
Format and Orientation: Vertical Stack, Brick Bond and Panels
Tile format and laying orientation change how a wall reads, from a calm vertical stack to a busier brick bond pattern. Larger panels reduce the number of visible joints, while smaller formats allow for more layout flexibility.
- Vertical stack. Tiles aligned edge-to-edge vertically could emphasise the height of a wall and suit narrow feature areas.
- Brick bond (offset). A staggered pattern reminiscent of brickwork is commonly used for a more casual or textured feel; the stagger amount should follow the tile and installation system specifications rather than a fixed rule.
- Large panels. Big-format wall panels reduce the number of visible grout joints, though handling, substrate and installation requirements differ from smaller tiles and should be confirmed with the installer.
- Mosaic accents. Small-format mosaic tiles are often used for niches, borders or shower feature strips where curves or detail are needed.
Beyond overall orientation, specific tile shapes carry their own visual identity, commonly referenced by names such as subway, herringbone, hexagon, chevron, zellige-look, penny round, kit-kat (a thin, linear mosaic format) and fish scale, each creates a different visual character and is best reviewed as a physical sample rather than by name alone.
Texture and 3D Relief Tiles for Feature Walls
Textured and 3D relief tiles add depth to a wall through raised or sculpted surface patterns, and are commonly used on walls, where their raised surfaces can create a feature without being subject to foot traffic. These finishes are often used to create a focal point without relying on colour alone.
- Sculptural relief. Raised geometric or organic patterns catch light differently depending on the viewing angle.
- Feature zone use. 3D relief tiles are commonly contained to a single wall or accent strip rather than an entire room.
- Maintenance consideration. Textured surfaces may require more attention during cleaning than flatter finishes.
- Finish pairing. Relief tiles are often paired elsewhere in the room with a plain tile in one of the flatter tile finishes to avoid visual overload.
How Lighting Changes the Way a Wall Tile Reads
Lighting direction and intensity can affect how a wall tile’s colour, texture and glaze appear. The same tile can look noticeably different under warm downlights compared with daylight or cool-toned LED strips.
- Raking light. Light angled across a textured or relief wall tends to exaggerate shadow and depth.
- Warm vs cool lighting. Warm- and cool-toned lighting can shift how colours and undertones are perceived
- Glossy vs matte response. Glossy finishes tend to reflect more light and can show glare near strong fixtures, while matte finishes diffuse light more evenly.
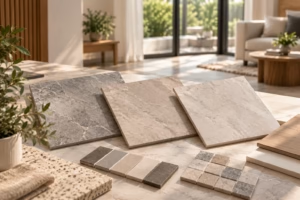
- Sample testing. Viewing a tile sample under the actual room’s lighting condition before ordering is generally recommended.
Using Grout as a Design Element
Grout colour and joint width influence how a tiled wall reads as a whole, and are often treated as an intentional design choice rather than a technical afterthought. A contrasting grout can emphasise the pattern, while a matching grout can make the joints less visually prominent.
- Matching vs contrasting. Matching grout commonly reads as a continuous surface with the tile as the focus, while contrasting grout tends to emphasise the layout pattern; the suitable colour generally depends on the space and cleaning routine.
- Joint width. Joint width should follow the tile, adhesive and installation system specifications rather than a general rule, as this can vary by product and format.
- Grout type. Different grout products, detailed in our grout guide, offer different stain resistance and maintenance characteristics.
Planning Around Sockets, Niches, Shower Valves and Edges
Practical fittings such as sockets, shower valves, niches and external corners need to be planned into the wall tile layout early, since changing these after tiling can be more disruptive and may add cost. Coordinating these details with the installer before work begins commonly avoids awkward cuts.
- Sockets and switches. Positioning should ideally be finalised before tiling to avoid off-centre plates or excessive cutting.
- Recessed niches. Shower or vanity niches are often planned to align with the tile grid to minimise small cut pieces.
- Shower valves and fittings. Valve and mixer positions should be coordinated with the tiler in advance to avoid tile pattern disruption.
- External corners and edges. Edge trims, mitred corners or bullnose profiles are commonly used to finish exposed tile edges cleanly; final trim choice should be confirmed with the installer.
A Practical Wall Tile Design Checklist
Working through wall tile decisions in a logical sequence could help reduce changes once installation begins. The checklist below summarises the planning points covered across this guide.
- Confirm height and layout. Decide between full-height, half-height or a feature band before selecting tile format.
- Choose format and orientation. Confirm whether a vertical stack, brick bond or large panel suits the wall proportions.
- Review texture and finish. Decide where textured or 3D relief tiles will be used, and where a flat finish is more practical.
- Plan grout colour and type. Confirm grout colour, joint width and product type with the installer.
- Coordinate fittings. Confirm socket, niche and valve positions with the installer before tiling begins.
- Check the specifications. Final substrate, adhesive and installation requirements should be confirmed with the project consultant or installer, and product suitability should be reviewed against the Kimgres tile collection data sheets.
Frequently Asked Questions About Wall Tiles Design
Can I tile only behind the stove instead of the whole kitchen wall?
Yes. A contained backsplash zone can be used instead of tiling the entire wall, with the remaining area finished in paint or another wall material.
Do dark-coloured wall tiles make a small bathroom feel smaller?
Darker tones can make a small space feel more enclosed, though this depends on lighting, tile finish and the amount of natural light available. Glossy and matte finishes can produce different light and reflection effects, so the result should be reviewed under the room’s actual lighting.
How do I avoid an awkward small tile cut next to the shower valve?
Planning the tile layout and valve position together before installation is generally the most effective way to avoid small, visible cut pieces. Discussing the layout grid with the installer ahead of time allows adjustments to valve placement or the tile starting point.
Can the same tile be used on both a feature wall and the adjoining floor?
Some projects use a coordinated or matching tile across floor and wall for a seamless look, though floor and wall tiles may carry different technical requirements even within the same collection. This should be confirmed against the product specification for each application.
Can floor tiles be used on walls, or wall tiles used on floors?
Suitability depends on the specific product and intended application.
Is it more expensive to tile a wall floor-to-ceiling than half-height?
Full-height tiling generally uses more material and labour than a half-height or feature band approach, though overall cost depends on tile choice, wall size and layout complexity. A project-specific estimate is best obtained from the installer or supplier.
What is a reasonable amount of pattern to use on one feature wall?
There is no fixed rule, a bold pattern can be balanced with simpler surrounding surfaces, depending on the overall design.
Conclusion
Wall tile design decisions, from layout height to format, texture and grout, influence how the finished space looks and functions beyond basic material choice. Planning fittings, lighting and grout early could help produce a more coordinated result than adjusting after installation has begun. Full-height, half-height and feature band approaches each suit different budgets and design goals.
Always check the product data sheet against the intended application before specifying a wall tile layout for a project.
To review wall tile design options and their data, browse the Kimgres tile collection, or contact Kimgres for samples and product data.
Note: Tile suitability, durability, and slip resistance may vary depending on project conditions, installation methods, and usage. Final selection should be confirmed with your project consultant or relevant professional.